
Flashing Repair in the USA
Flashing directs water away from valleys, walls, chimneys and vents. When metal bends, sealant cracks or nails back out, water follows the decking grain and drips from rafters onto ceiling drywall. Top Notch Matthews Roofing maps each drip path before any material is touched.
Technicians measure overlap distances, check counter-flashing depth into masonry and test step flashing alignment on slopes. They note corrosion color changes and record seam gaps that exceed manufacturer tolerances. These measurements determine whether a patch or full section replacement restores the watershed. Water migrates along rafters until reaching damaged areas that require flashing repair from Top Notch Matthews Roofing across the USA.
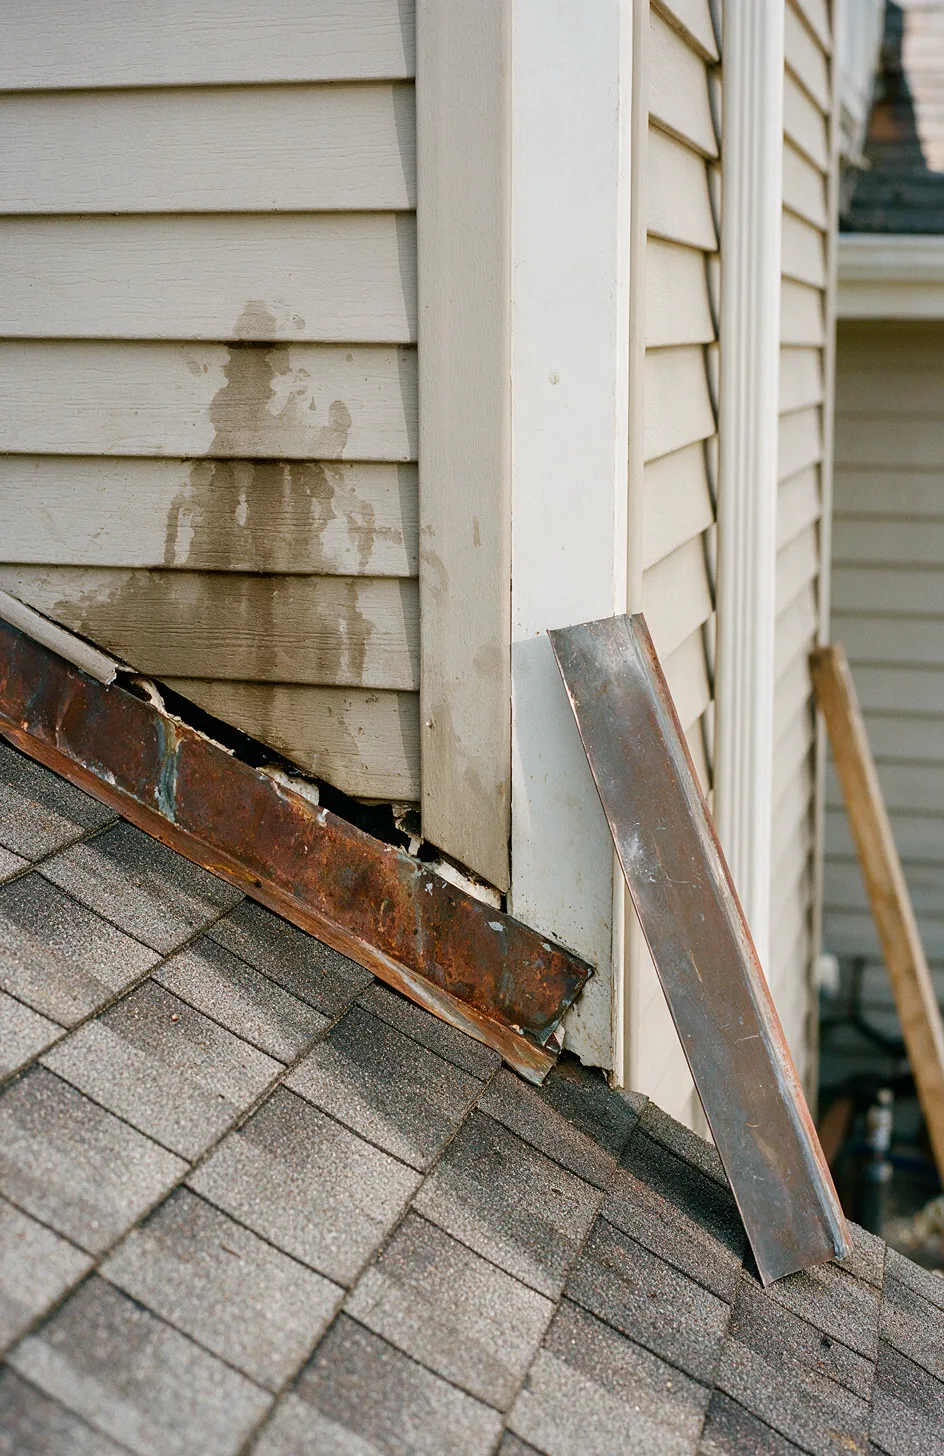
Visible Indicators of Flashing Failure
- Brown water rings appear on ceilings near roof edges
- Damp drywall softens directly below a chimney chase
- Dark streaks run down exterior brick below step flashing
- Granule loss concentrates in valleys after heavy rain
- Rust powder collects on attic floor under vent boots
Common Points Where Flashing Lets Water Through
Step flashing beside walls loosens when wind lifts shingles and pulls nails. Water then travels sideways along the decking until it reaches a rafter and drips. Our technicians lift shingles only far enough to inspect each course and mark every loose nail.
Base flashing around chimneys often separates when mortar joints erode. Rain follows the gap down the flue and exits onto the ceiling. We measure the height of the counter flashing and record how far the base extends under the shingles.
Boot flashing at pipes cracks when ultraviolet light hardens the rubber collar. Water runs along the pipe and spreads across the sheathing. We record the boot diameter and note whether the sealant has pulled away from both the metal and the shingle surface.
Inspection Steps Our Technicians Follow
We begin at the ceiling stain and use a moisture meter to trace the wettest path upward through insulation. The meter readings guide us to the rafter directly above the stain. From there we move to the roof plane and locate the nearest flashing intersection.
On the roof we photograph each flashing course and measure overlap lengths. We check for proper slope on cricket flashings and verify that step flashing extends at least two inches under the shingles. All measurements are logged before any repair begins.
We test sealant adhesion with a putty knife at every joint. Soft or powdery sealant is noted for replacement. Metal panels are checked for nail holes that have elongated, allowing water to enter beneath the head.
Repair Choices and Material Specifications
Small seam gaps receive new high-temperature sealant applied over clean metal. Larger sections of step flashing are cut out and replaced with matching gauge aluminum or copper that matches the existing thickness. Each new piece overlaps the lower course by at least three inches.
Damaged pipe boots are removed by sliding the old flashing out from under the shingles. New boots are installed with an aluminum base that extends four inches past the pipe in all directions. We bed the base in roof cement before reinstalling the shingles.
When counter flashing has pulled from brick, we cut a new reglet slot one-half inch deep and insert the metal. The slot is then pointed with mortar that matches the original color. This restores the watershed without disturbing the entire chimney crown.
What Homeowners Can Check Before Technicians Arrive
Look inside the attic during daylight and note any pinpoints of light near flashing lines. Mark those spots with tape on the rafters so our crew can reference them quickly. Avoid walking on the roof or applying caulk yourself, because added material can hide the true entry point.
Photograph any interior stains and note the date and weather conditions when they first appeared. This timeline helps us correlate the leak with wind-driven rain or ice-dam events. Keep the area below the stain clear so moisture readings can be taken without moving stored items.
Flashing Repair questions
How does water travel from flashing to the ceiling?
Water enters a small gap at the flashing edge, follows the grain of the decking, and reaches the nearest rafter. It then drips or wicks along the rafter until it finds a ceiling penetration. Our technicians follow this exact route during every inspection.
What metals does Top Notch Matthews Roofing use for flashing replacement?
We select aluminum, copper or stainless steel to match the existing gauge and corrosion resistance. Each piece is cut to maintain the original overlap dimensions so water continues to shed correctly over the shingles below.
Can flashing be repaired without removing shingles?
Small sealant repairs can be completed from above the shingles. When metal must be replaced, shingles above the flashing are lifted only enough to slide the new piece into place. This limits disturbance to the surrounding roof surface.
Why does sealant fail on vent boots?
Ultraviolet light hardens the rubber collar until it cracks. Temperature cycles then cause the sealant to pull away from both the metal base and the shingle surface. We replace the entire boot assembly rather than layering new sealant over failed material.
Request Flashing Repair
Contact Top Notch Matthews Roofing to schedule an inspection that traces every leak path from ceiling to flashing.